

Policies
Policies are configured separately for each application. They let you enable the built-in HiveTrace protection, define threat thresholds, create custom rules for user requests, and check messages or files against blacklists.
Open policy settings
Section titled “Open policy settings”- Select Applications in the sidebar.
- Open an application by clicking its ID.
- Select the Policies tab.
The page contains HiveTrace Guardrail settings, token thresholds, custom policies, and message and file blacklists.
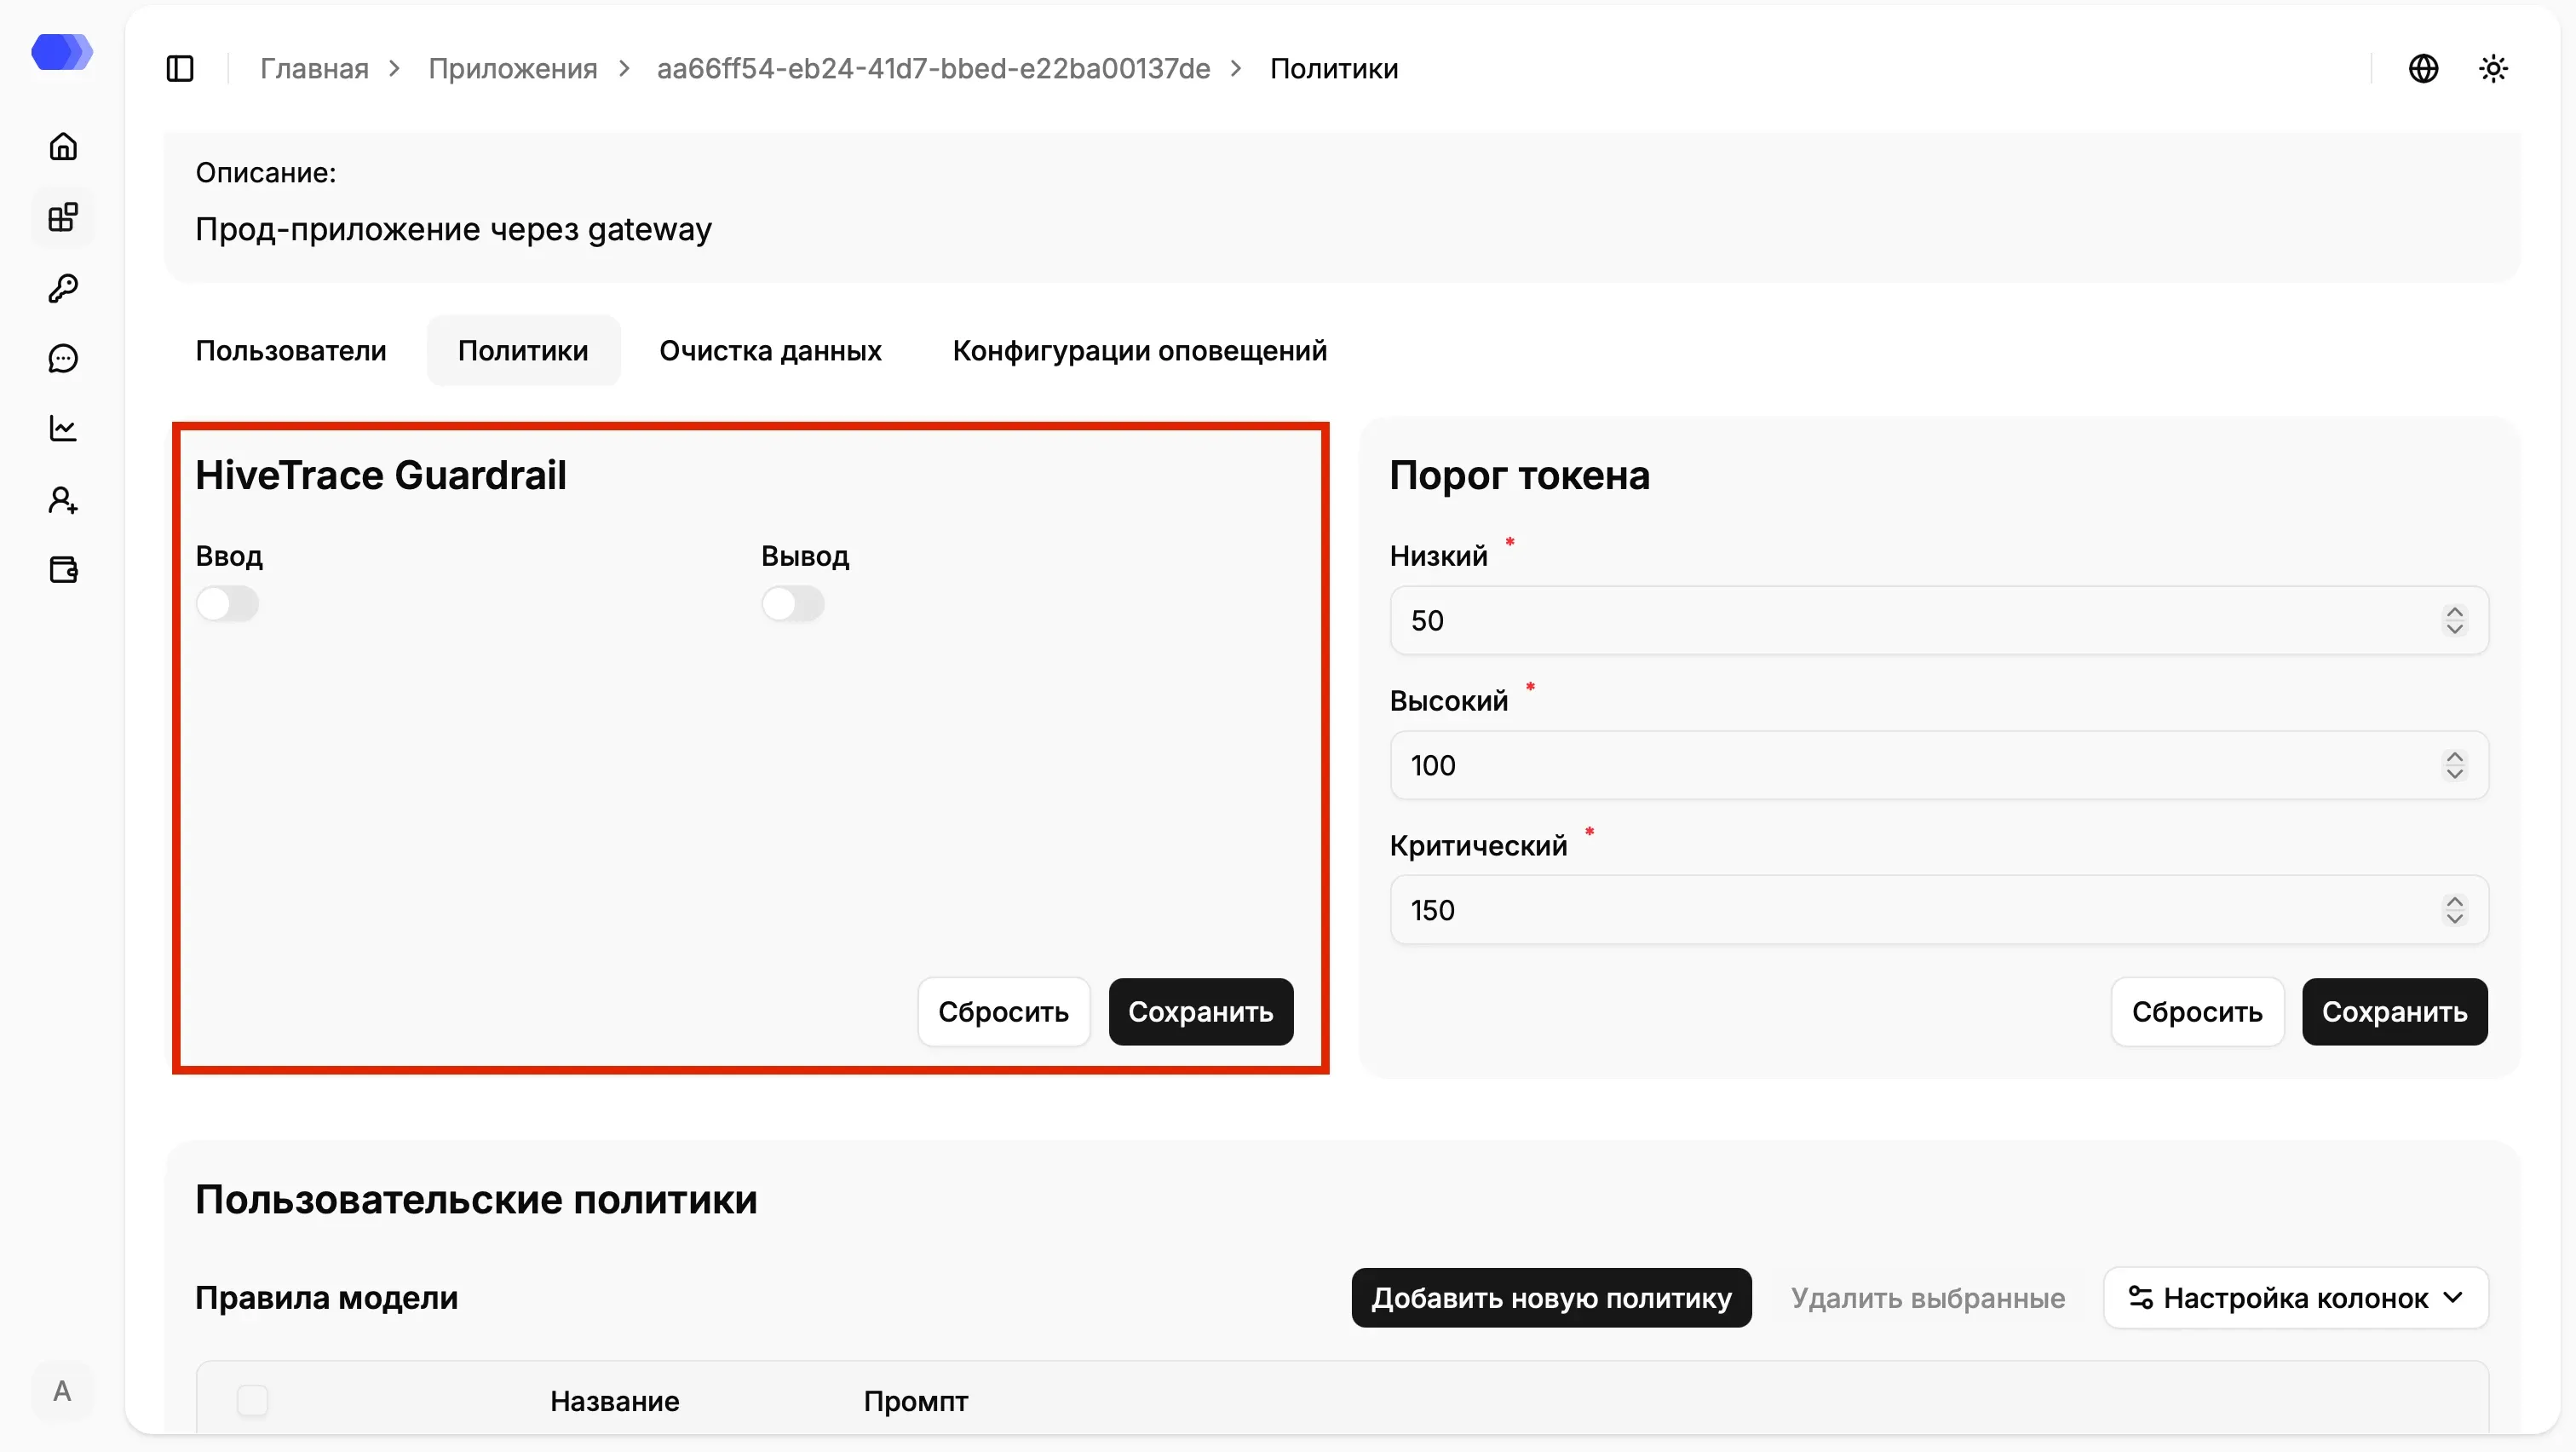
HiveTrace Guardrail
Section titled “HiveTrace Guardrail”HiveTrace Guardrail provides built-in protection against unsafe requests. Enable checks independently for each direction:
- Input checks messages sent from the user to the model.
- Output checks model responses before they are returned to the user.
Select Save to apply changes. Reset discards unsaved changes and restores the last saved values.
Token thresholds
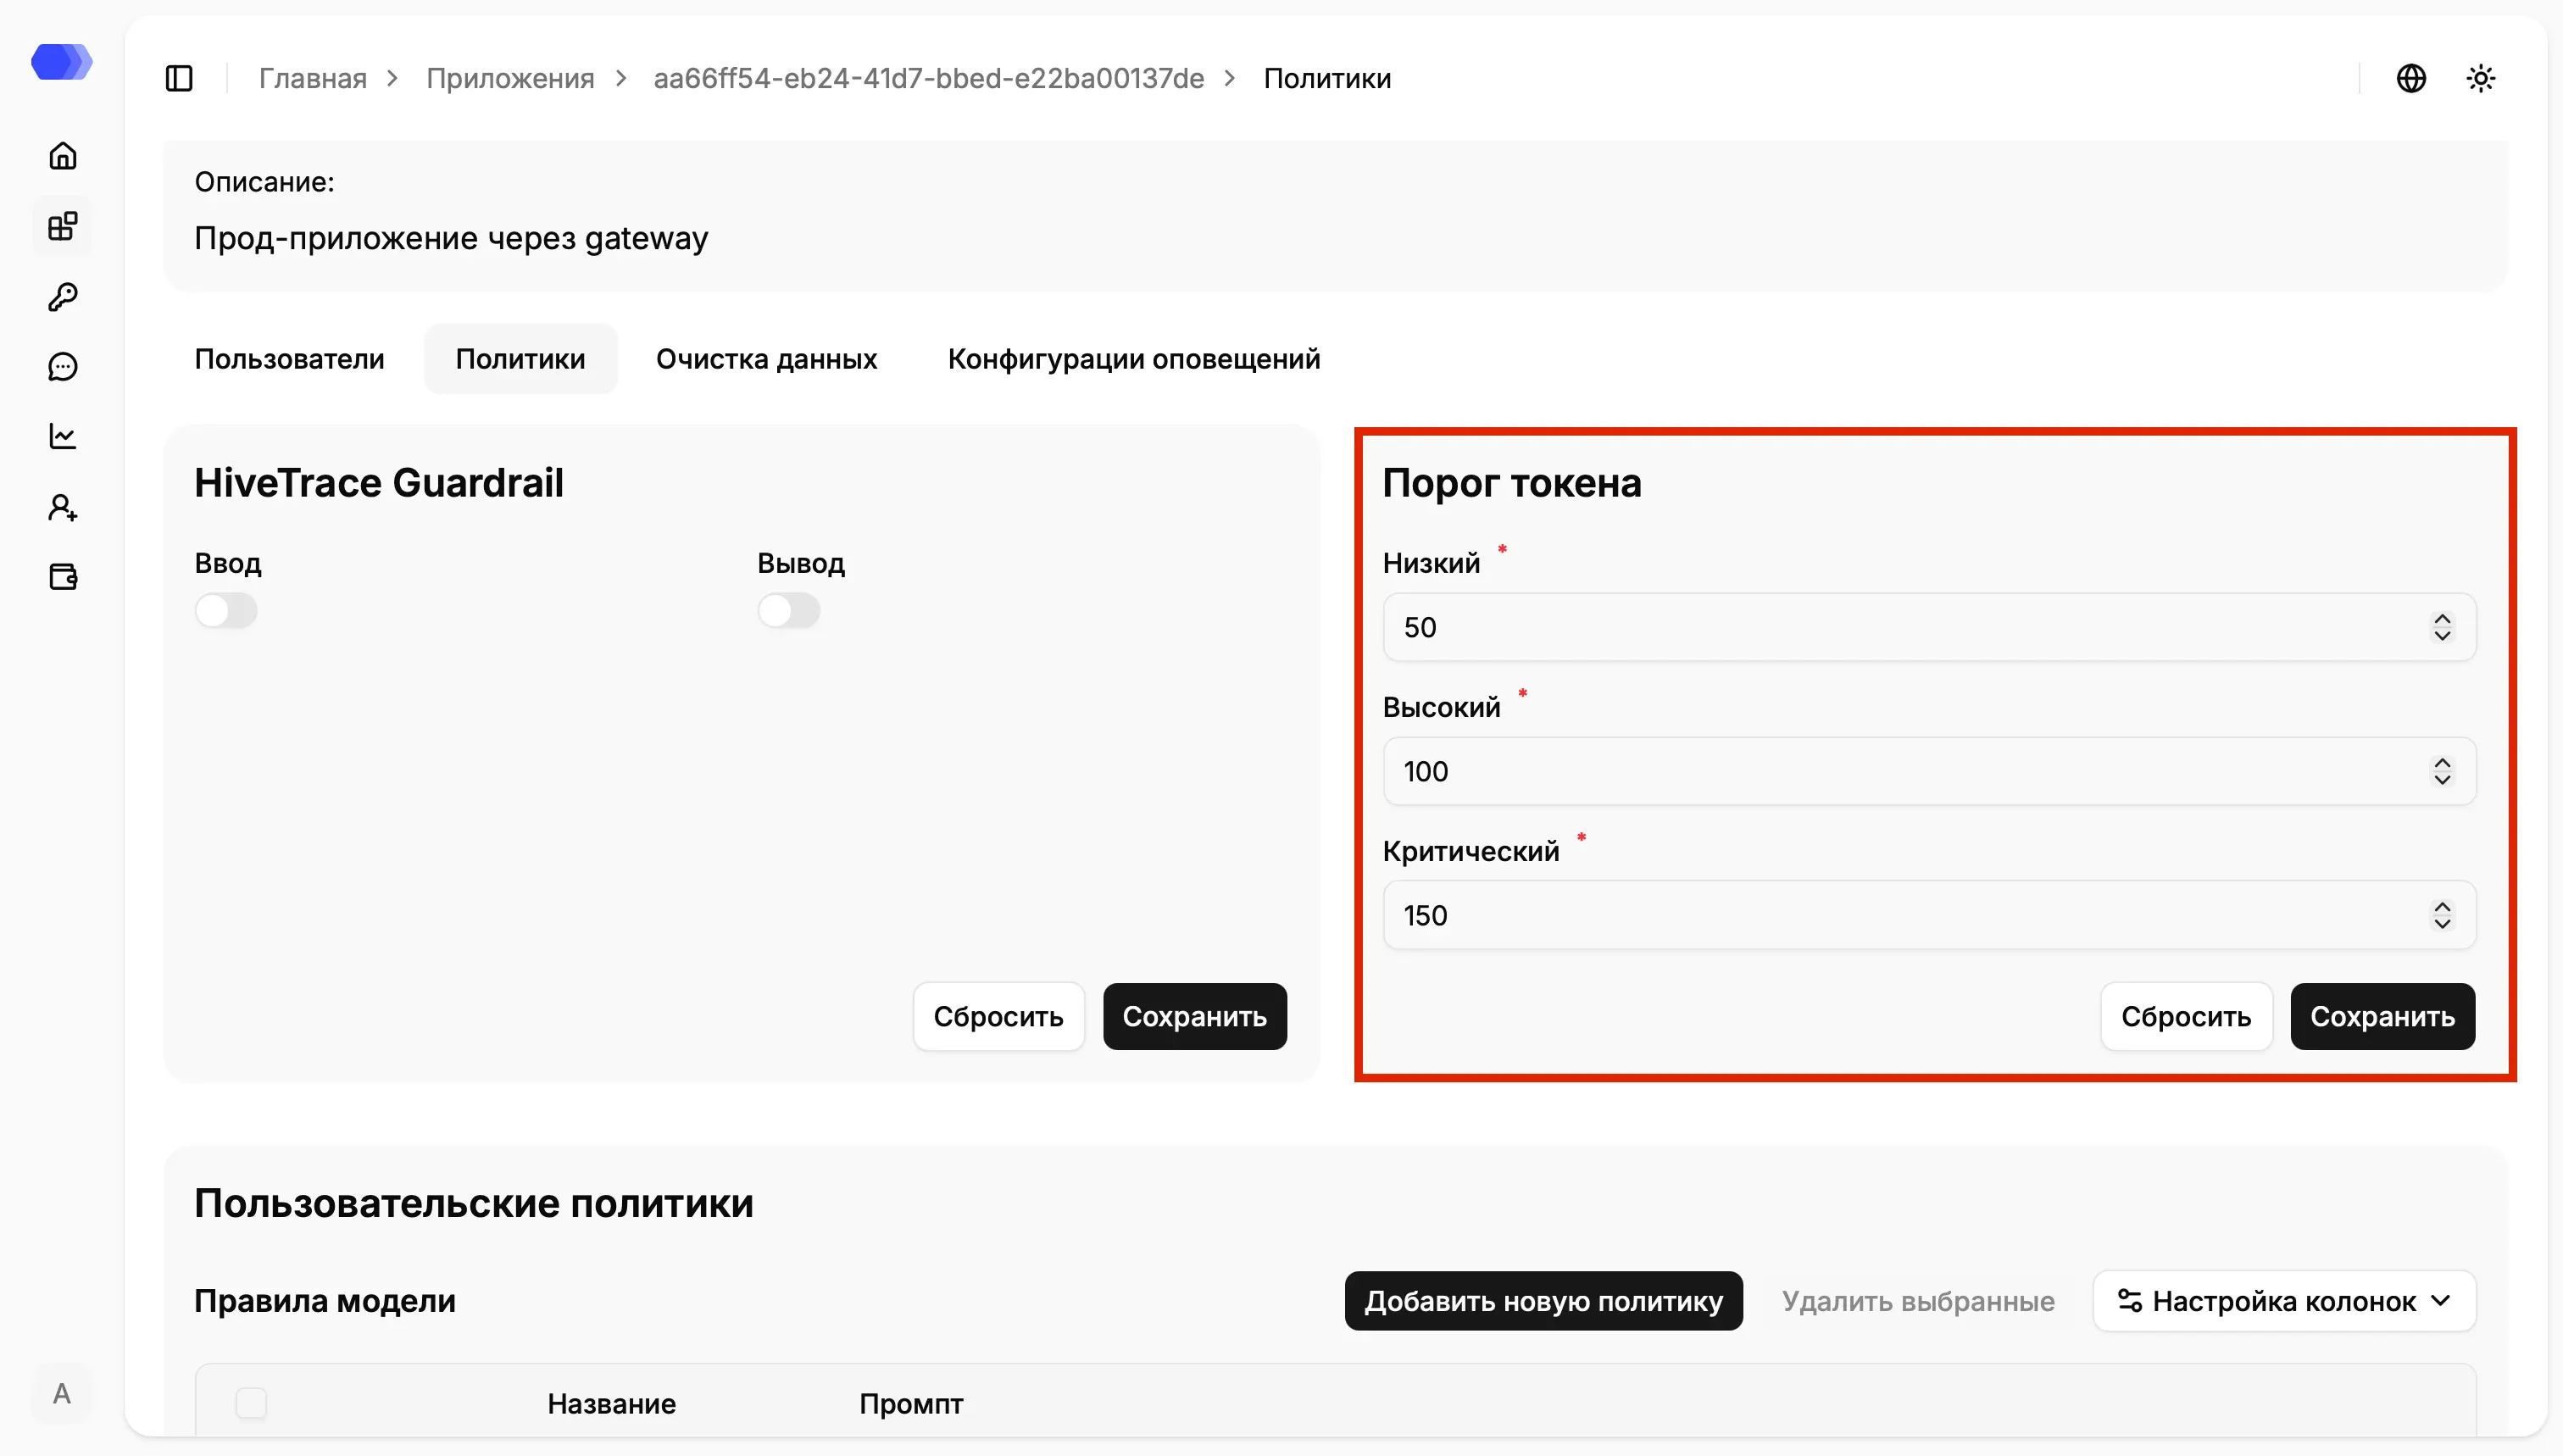
Section titled “Token thresholds”Token thresholds map a check result to a threat level. Set all three required values:
- Low is the first trigger boundary.
- High is the elevated-risk boundary.
- Critical is the critical-risk boundary.
Values must be ascending: Low must be less than High, and High must be less than Critical. Select Save to apply the values or Reset to discard unsaved changes.
Custom policies
Section titled “Custom policies”A custom policy validates user requests using an instruction prompt. The Model rules table displays the name and prompt of every policy.
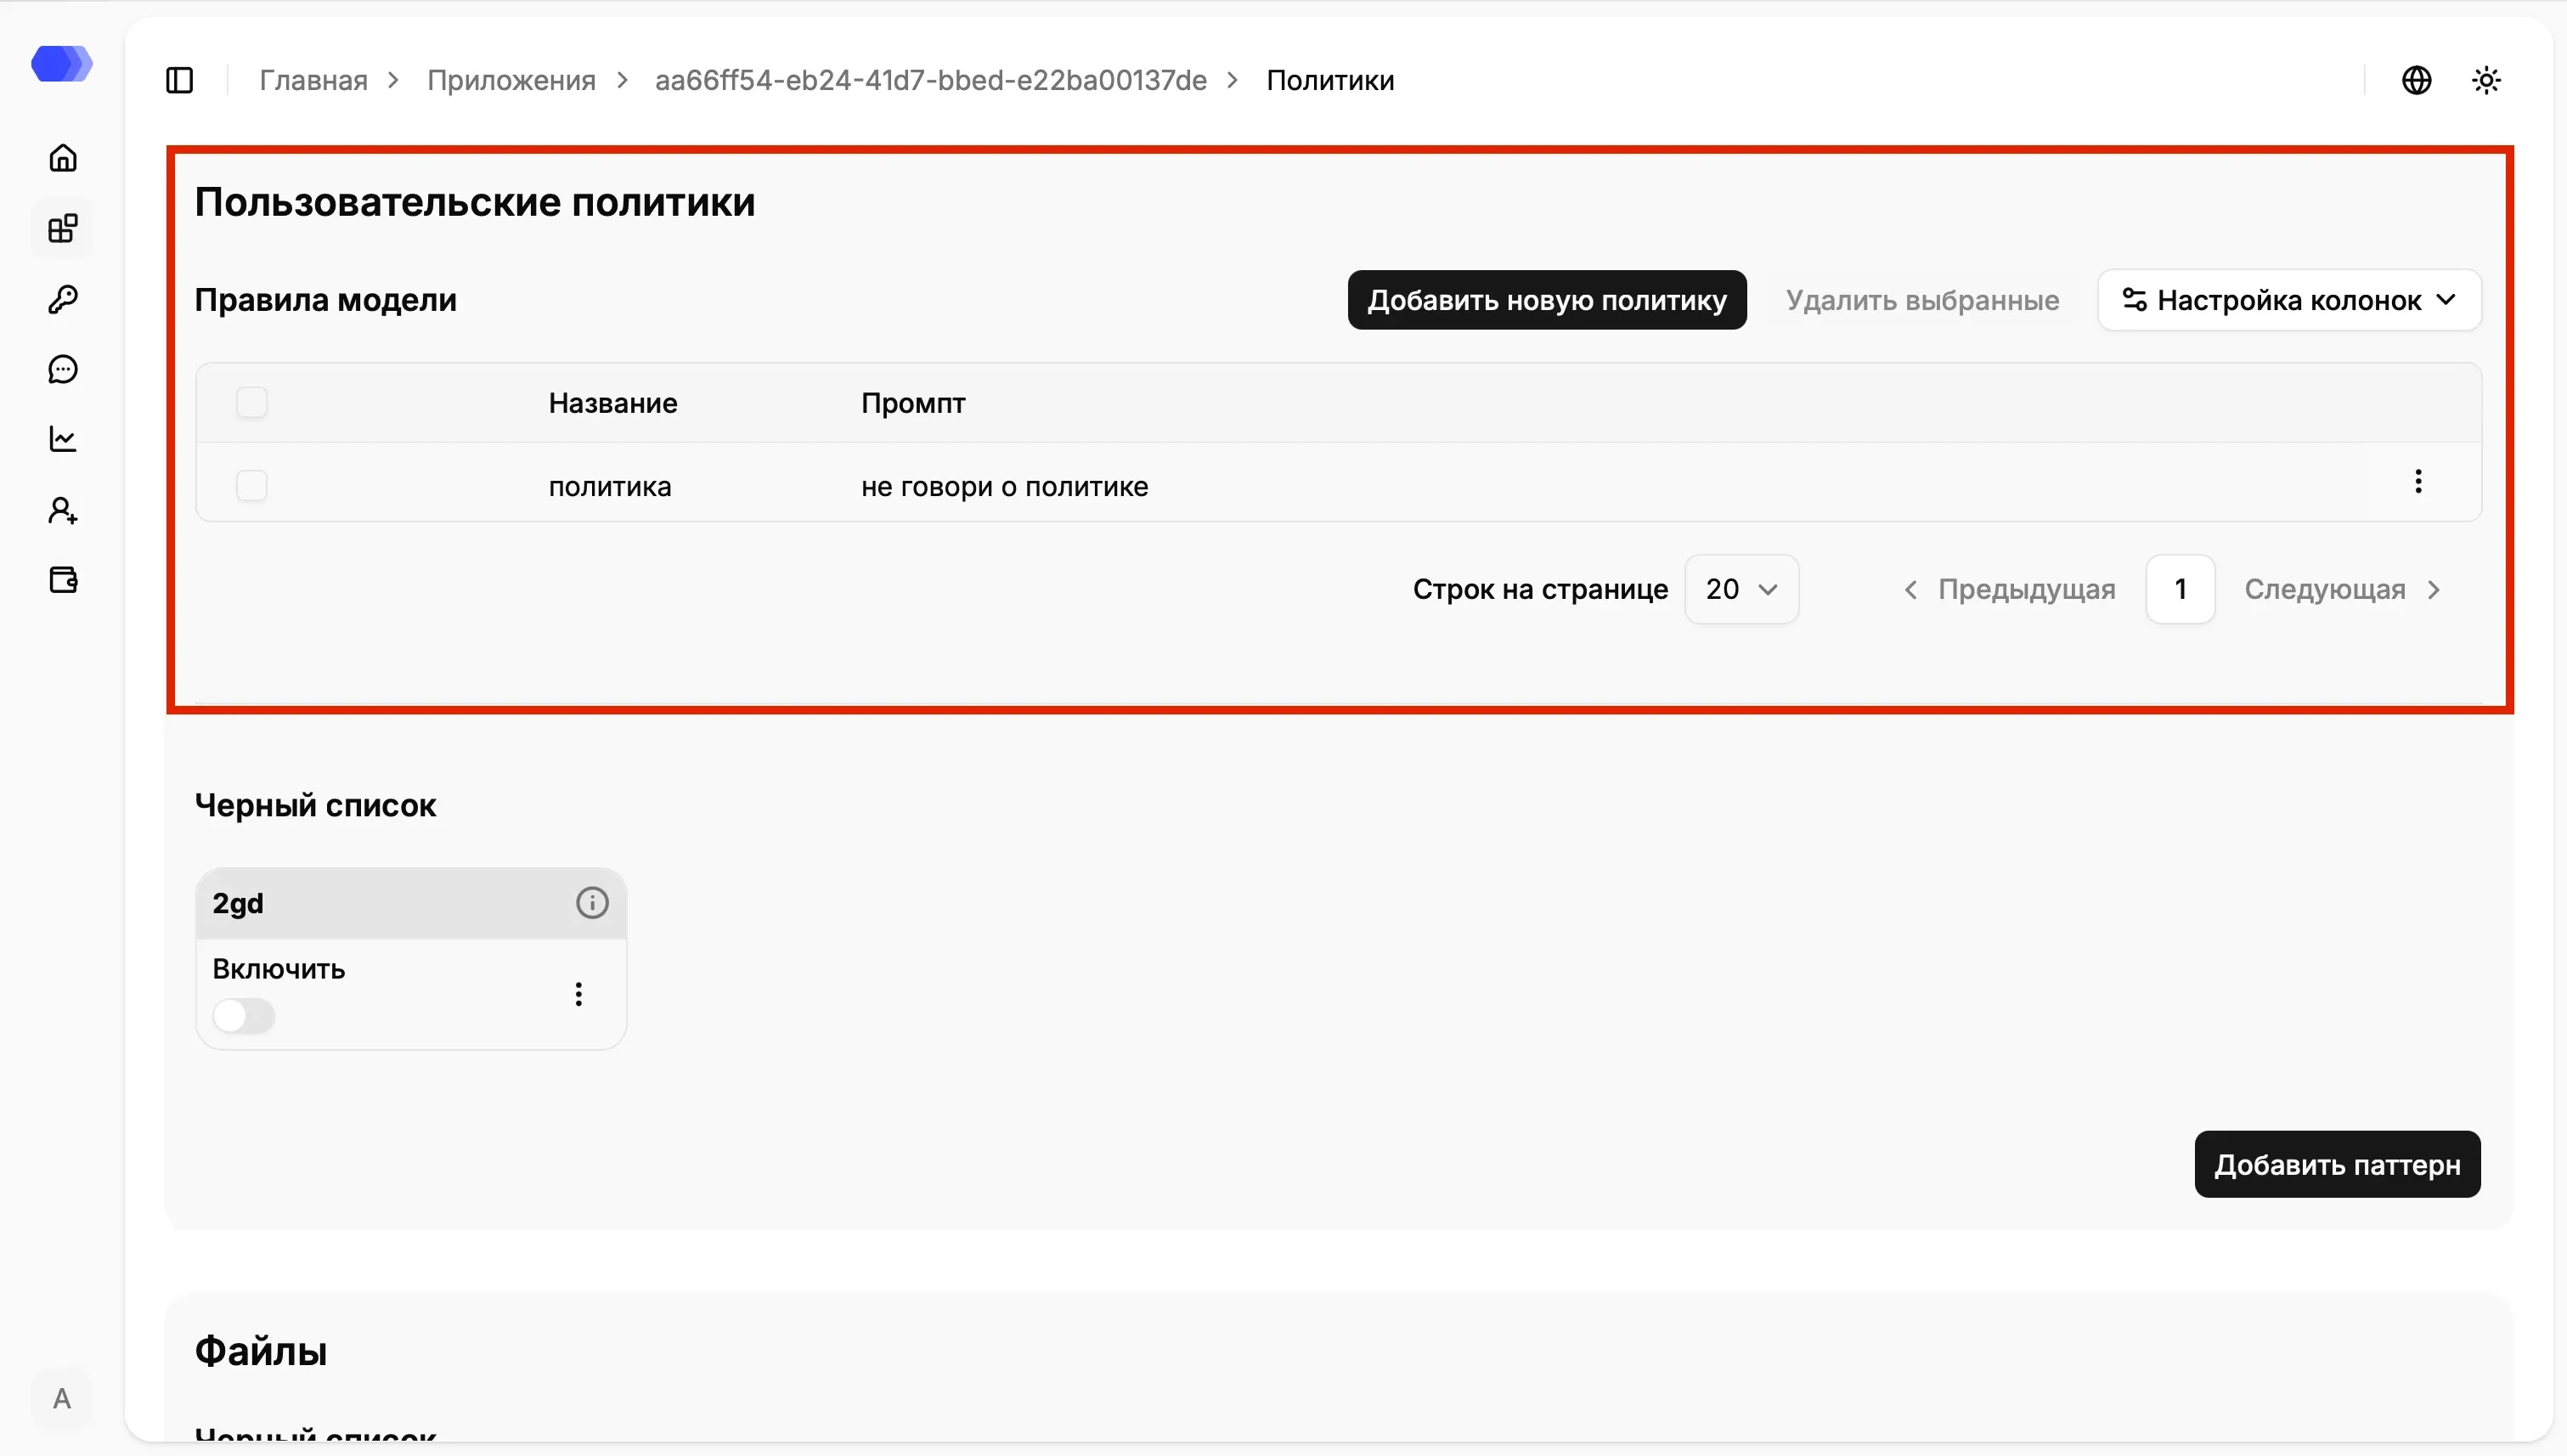
Available actions:
- Add new policy opens the policy form.
- A row checkbox selects a policy; the header checkbox selects all visible rows.
- Delete selected removes the selected policies and is enabled after at least one row is selected.
- Column settings controls which table columns are visible.
- The row ⋮ menu edits or deletes one policy.
- Rows per page, Previous, and Next control pagination.
Create, edit, and test a policy
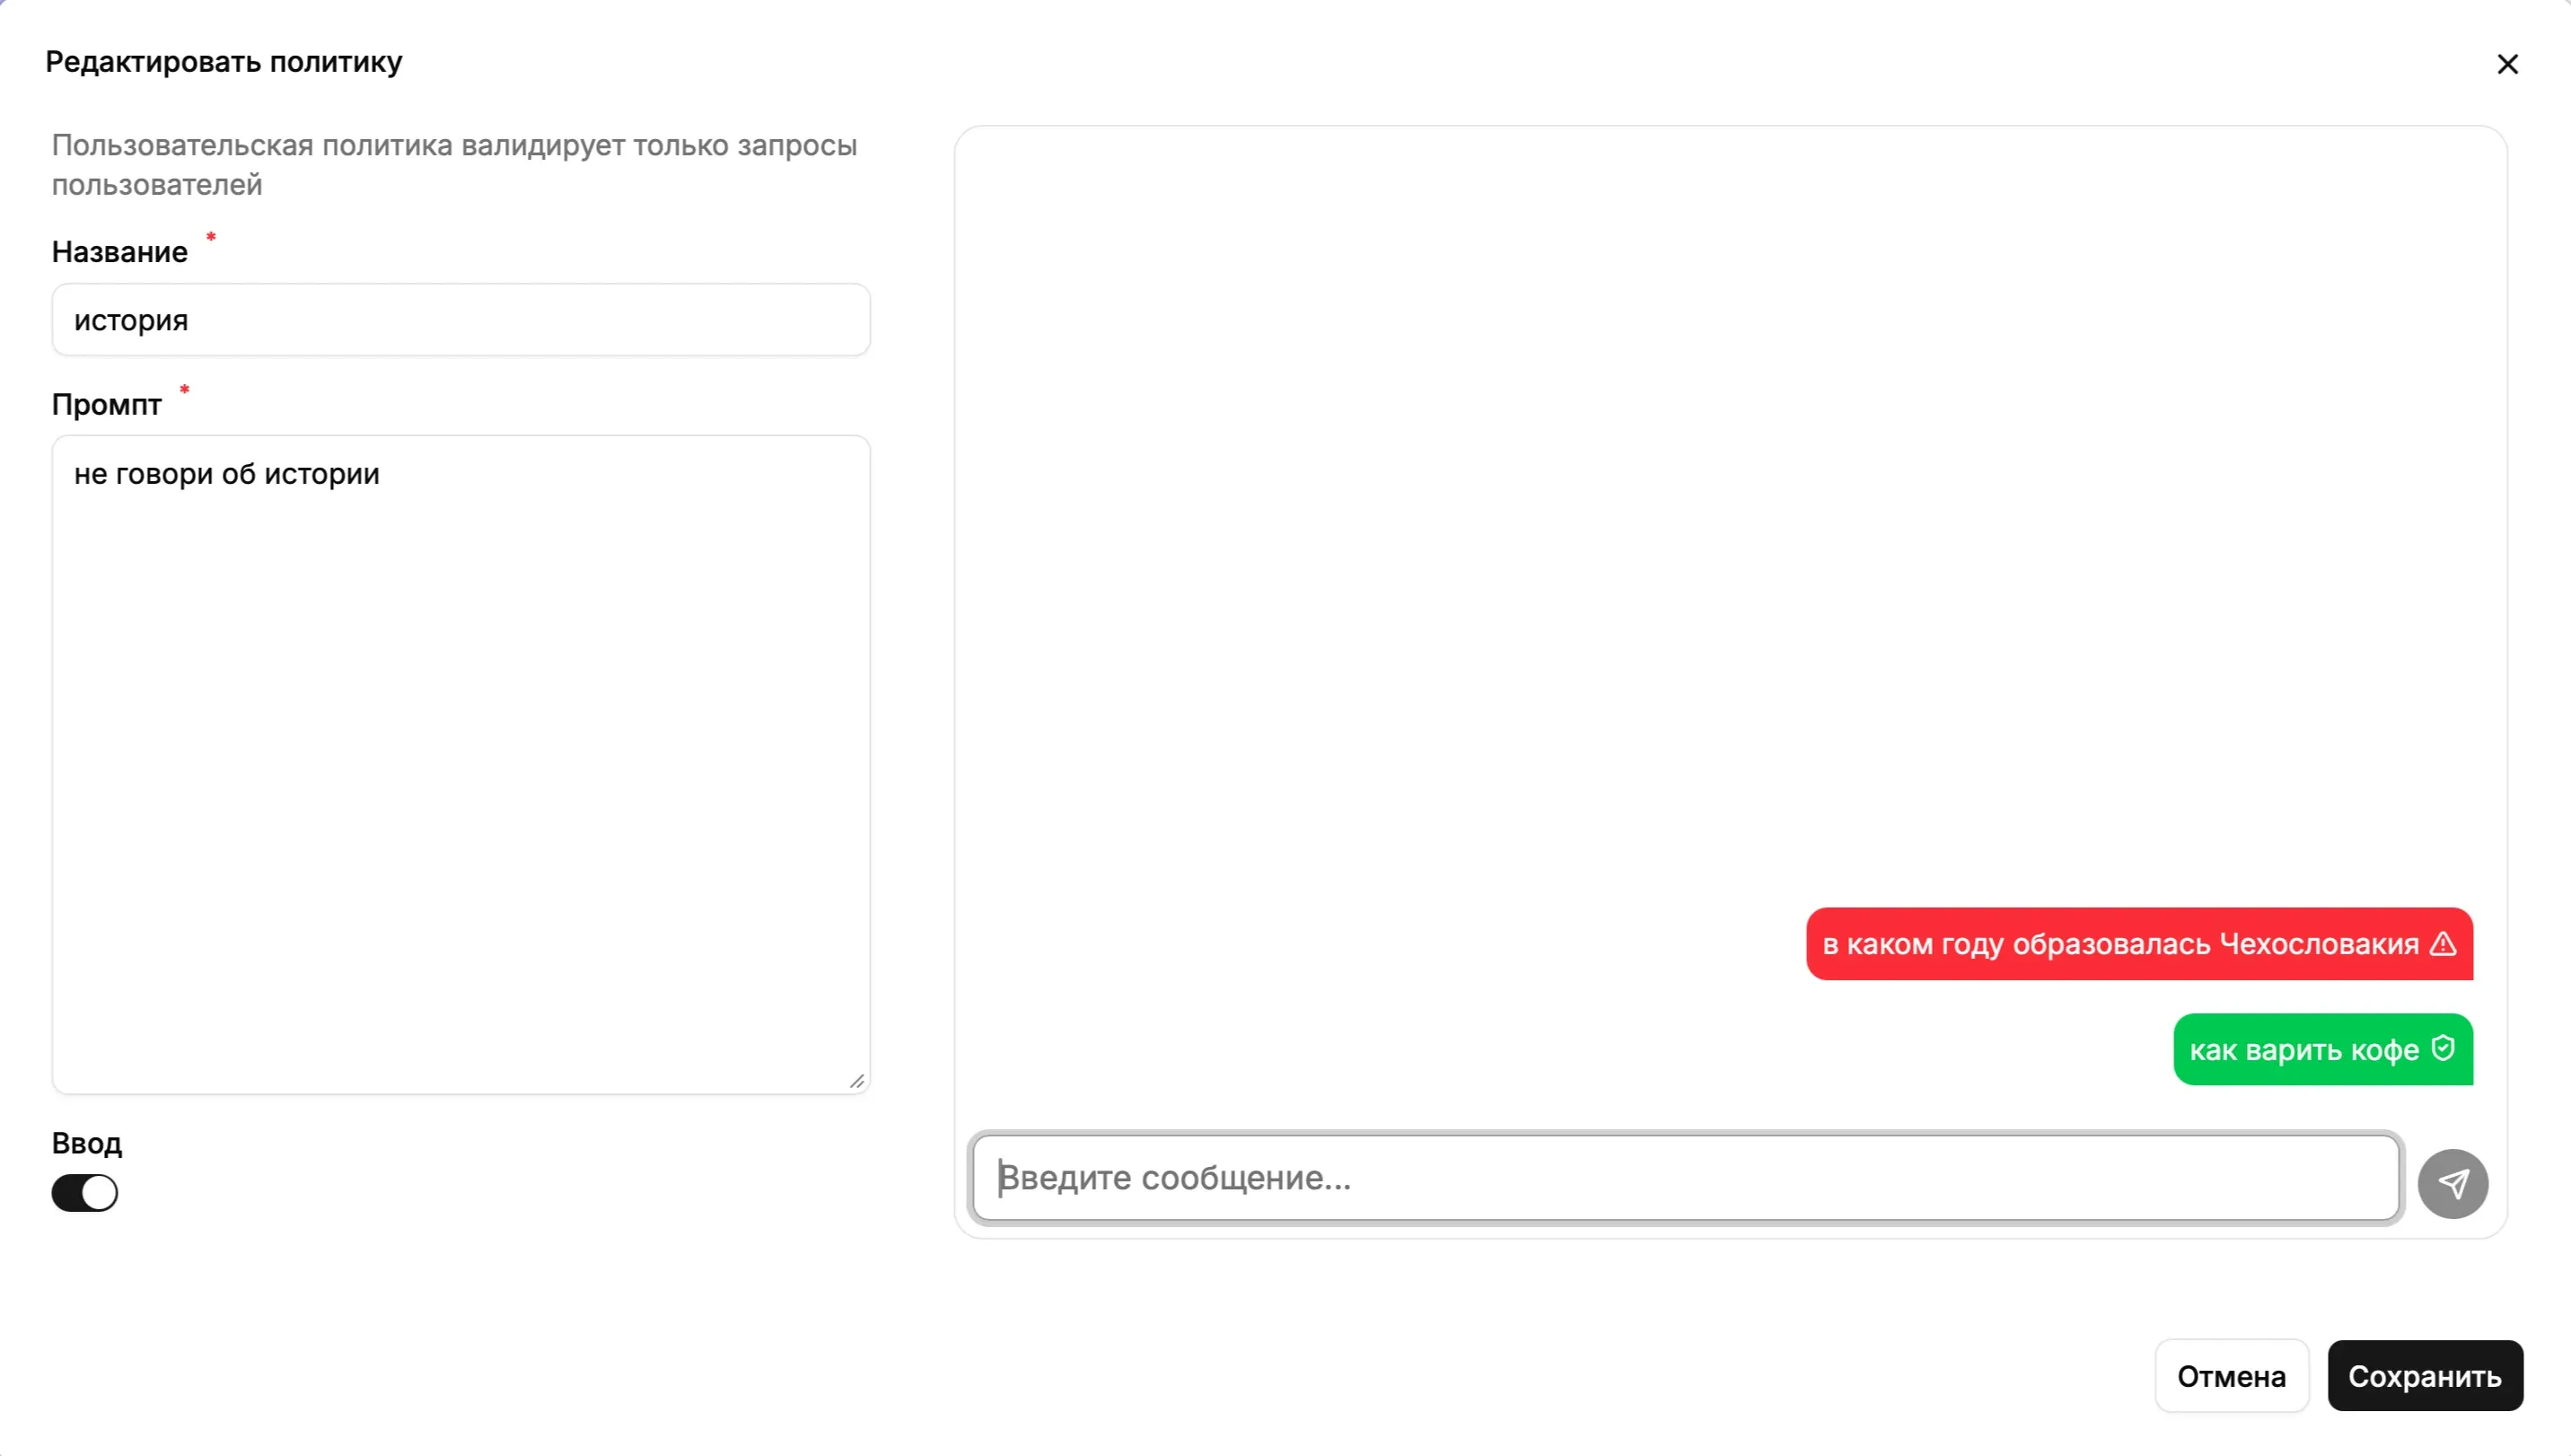
Section titled “Create, edit, and test a policy”Select Add new policy, or choose Edit from a row’s ⋮ menu. Complete these fields:
- Name — a clear, unique rule name.
- Prompt — the instruction used to validate user requests.
- Input — enables the policy for incoming messages.
Use the test panel on the right to enter a sample request and send it:
- a red message with a warning icon means the policy detected a violation;
- a green message with a shield means the request passed validation.
Test both prohibited and acceptable wording. Select Save when finished; Cancel closes the form without saving.
Message blacklist
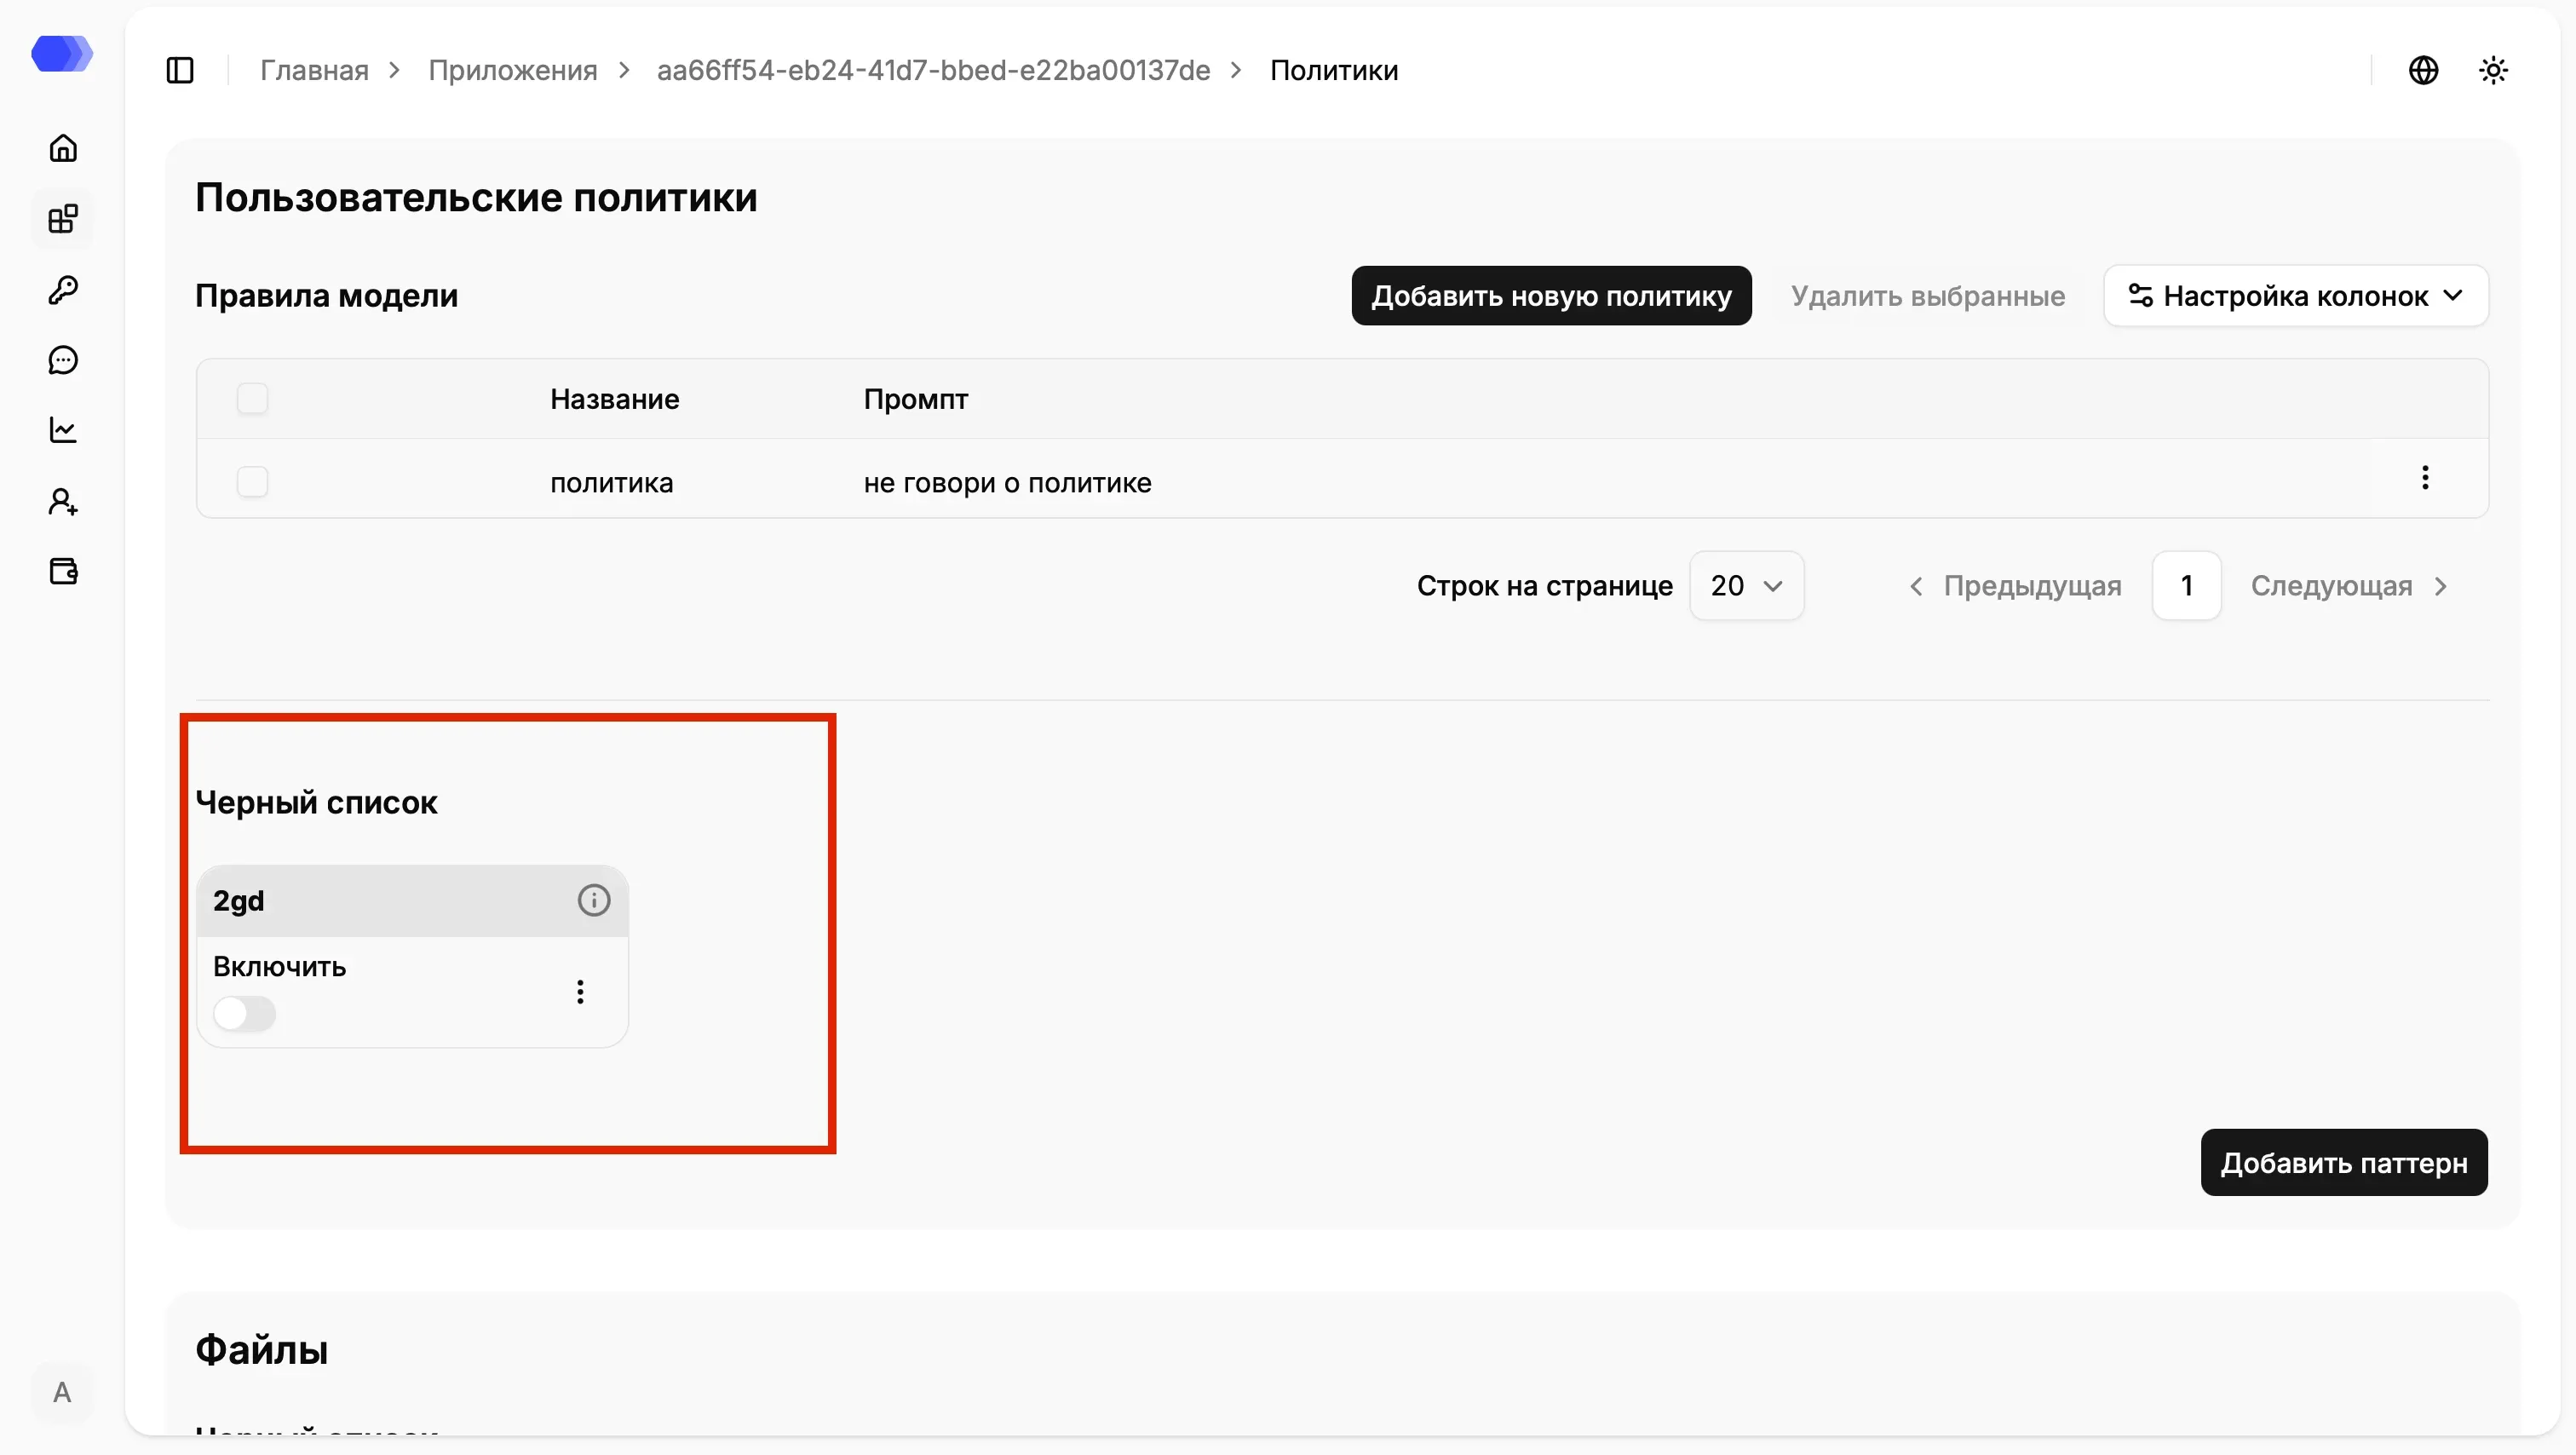
Section titled “Message blacklist”Patterns in this section are applied to message text. Each card contains the pattern name, an Enable switch, an information button, and a ⋮ menu for editing or deletion.
Select Add pattern to create a rule. A disabled pattern remains saved but is not used during checks.
File blacklist
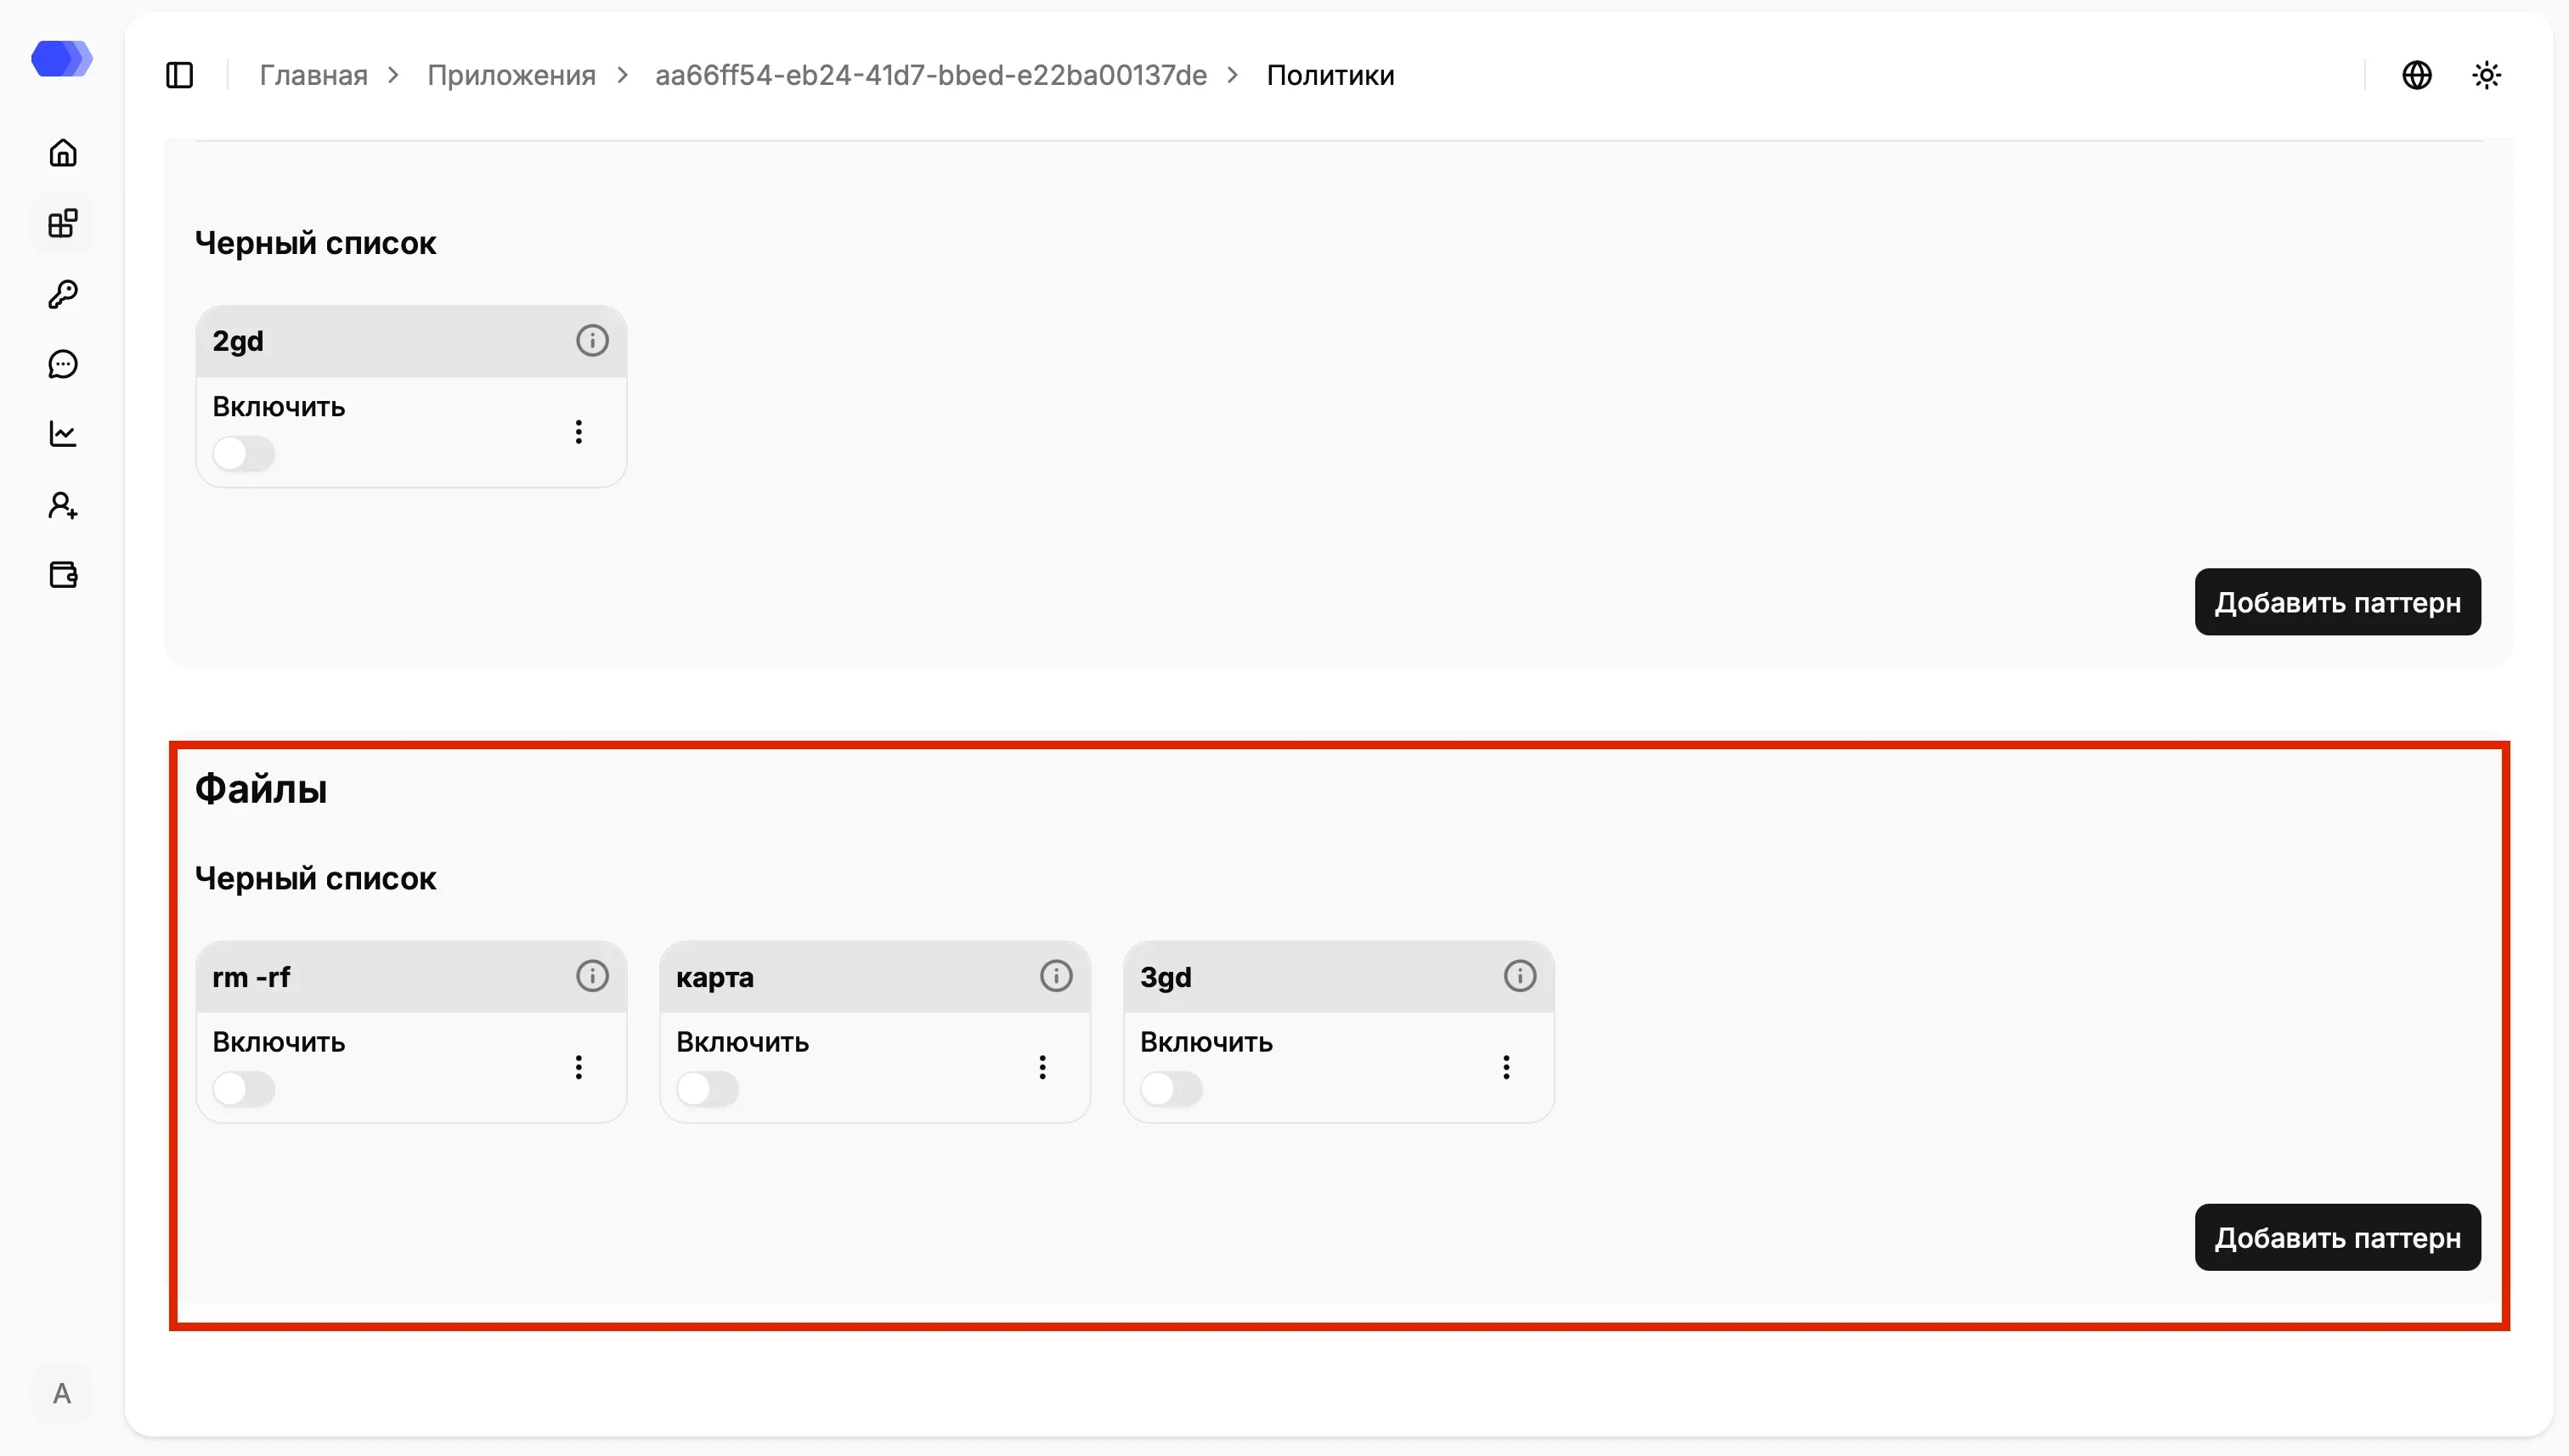
Section titled “File blacklist”The Files → Blacklist section works in the same way, but applies its patterns to the contents of files attached to a request. Individual rules can be enabled or disabled, inspected, edited, or deleted.
Add a pattern
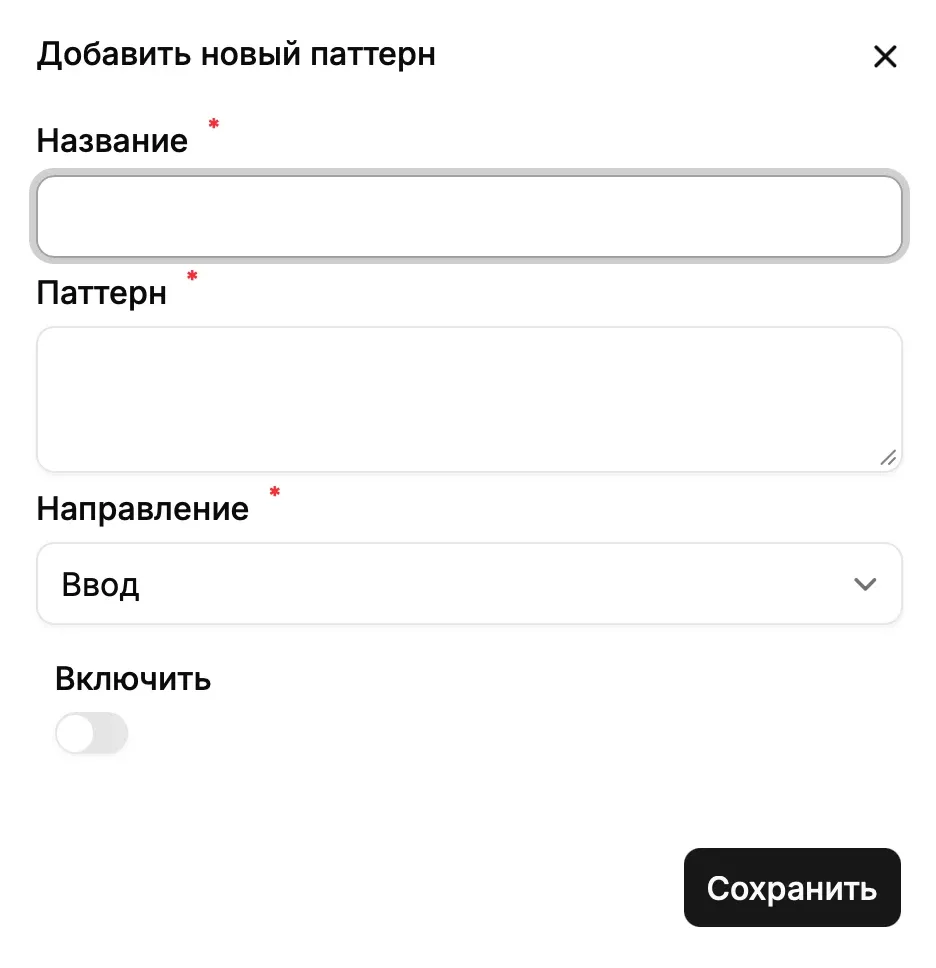
Section titled “Add a pattern”Select Add pattern in the appropriate section and complete the form:
- Name — the label displayed in the list.
- Pattern — a regular expression or another supported pattern expression.
- Direction — Input for user requests or Output for model responses.
- Enable — activates the rule immediately after creation.
- Save — creates the pattern. The × button closes the form without saving.
Test the expression on representative data before enabling it. An overly broad pattern can cause false positives.
Verify the result
Section titled “Verify the result”After saving the settings, send a test request through the connected application. To inspect triggers, open the record in Session Analytics, then use the Censors, Data cleaning, or Validation configuration tabs. With a synchronous protected integration, a detected violation can also block the request.